
")


Growing my own apple tree has been one of the most exciting and rewarding experiences in my garden. At first, I thought it would be difficult, but with a little patience and the right steps, it turned out to be a beautiful process.
In this guide, I’ll share exactly how I grew my apple tree — from a simple apple seed to a healthy young tree. Whether you want to grow apples for fresh eating or just enjoy having a lovely tree in your backyard, I’ll walk you through everything I learned.
Let’s get started!
Step 1: Preparing the Apple Seeds
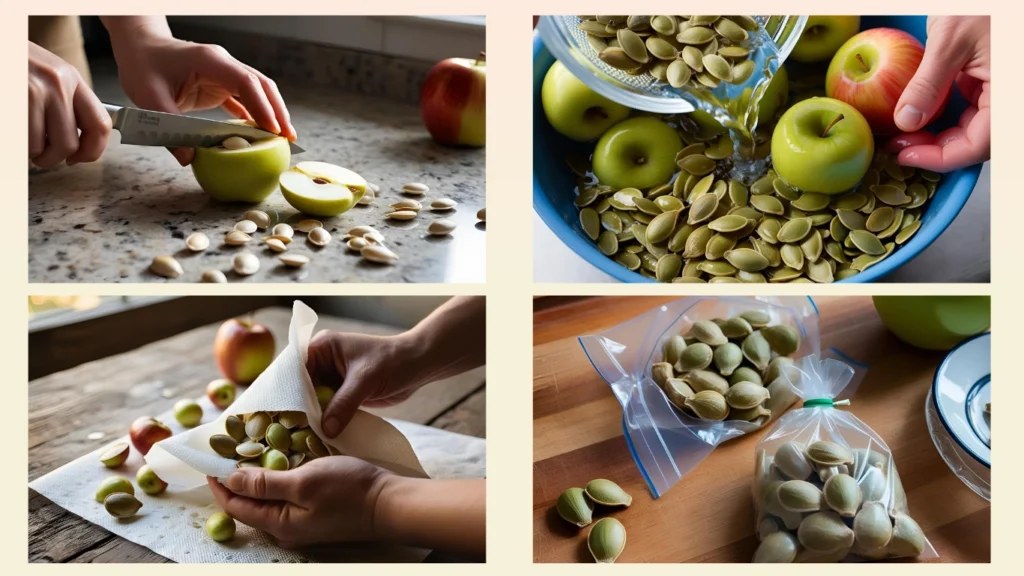
I started my journey by collecting seeds from a fresh apple I bought at the grocery store. I made sure to pick a ripe and healthy-looking apple because I wanted strong seeds.
Here’s what I did:
- I cut the apple carefully and removed the seeds.
- Then, I rinsed the seeds under cold water to remove any fruit residue.
- After drying them with a paper towel, I wrapped the seeds in a slightly damp paper towel.
- I placed the wrapped seeds inside a plastic bag and kept it in my refrigerator for about 6 weeks.
This chilling process, called stratification, helps the seeds “think” they’ve been through winter. Without it, they might not sprout properly.
It was important for me to check the seeds every week to make sure the paper towel stayed moist but not soaking wet.
Step 2: Planting the Sprouted Seeds
After about six weeks, I noticed that some of my seeds had tiny white roots starting to poke out. That was my sign it was time to plant them!
Here’s how I did it:
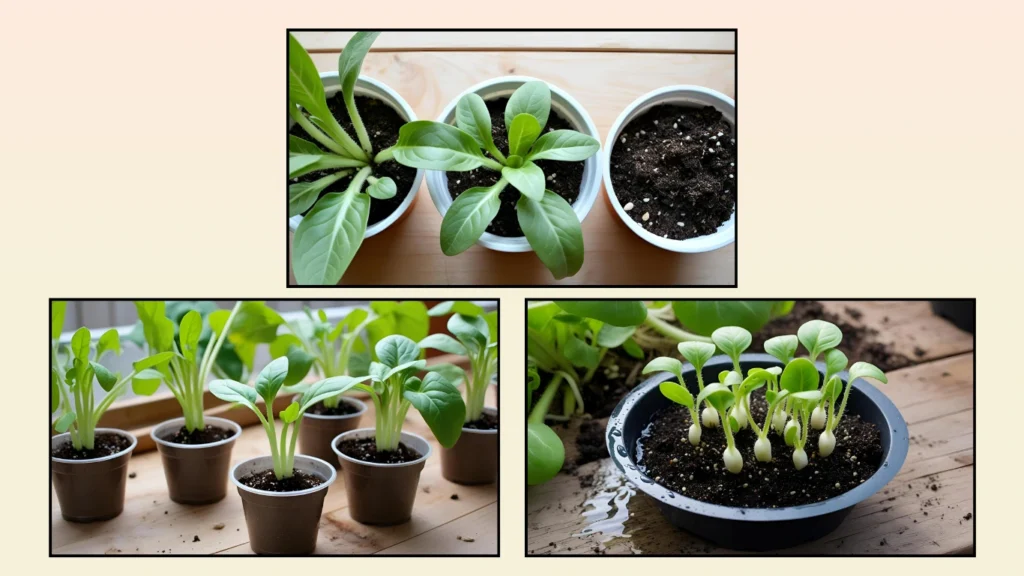
- I filled small pots with light, well-draining soil. I used a simple mix of potting soil and a little compost.
- Then, I made a small hole about half an inch deep and gently placed each sprouted seed inside, root pointing downward.
- I covered them lightly with soil and gave them a good watering.
I kept the pots near a sunny window where they could get at least 6 hours of light a day. Watching the little green shoots pop out of the soil was so exciting!
Step 3: Caring for My Apple Seedlings
Once my seedlings broke through the soil, I made sure to take extra good care of them. They were delicate at this stage.
Here’s what I focused on:

- Watering: I kept the soil slightly moist but not soggy. Overwatering can rot the roots, so I was careful.
- Light: I moved the pots around during the day to make sure they got enough sunshine.
- Thinning: If two seedlings grew too close together, I gently snipped one to give the other room to grow strong.
I also made sure the room temperature stayed around 65–75°F (18–24°C) — not too cold, not too hot.
Step 4: Transplanting My Young Apple Tree

After a few months, my strongest seedling grew about 6 to 8 inches tall. At that point, I knew it was time to move it outside.
Here’s how I transplanted it:
- I chose a sunny spot in my backyard with well-draining soil.
- I dug a hole twice as wide and just as deep as the root ball of my seedling.
- I gently removed the seedling from its pot, being super careful with the roots.
- I placed it in the hole, filled it with soil, and watered it deeply.
To help protect my little tree, I added mulch around the base — but not touching the trunk — to keep moisture in and weeds out.
Step 5: How I Take Care of My Apple Tree Outdoors
Once my apple tree was in the ground, taking good care of it became part of my weekly routine.
Here’s what I did:
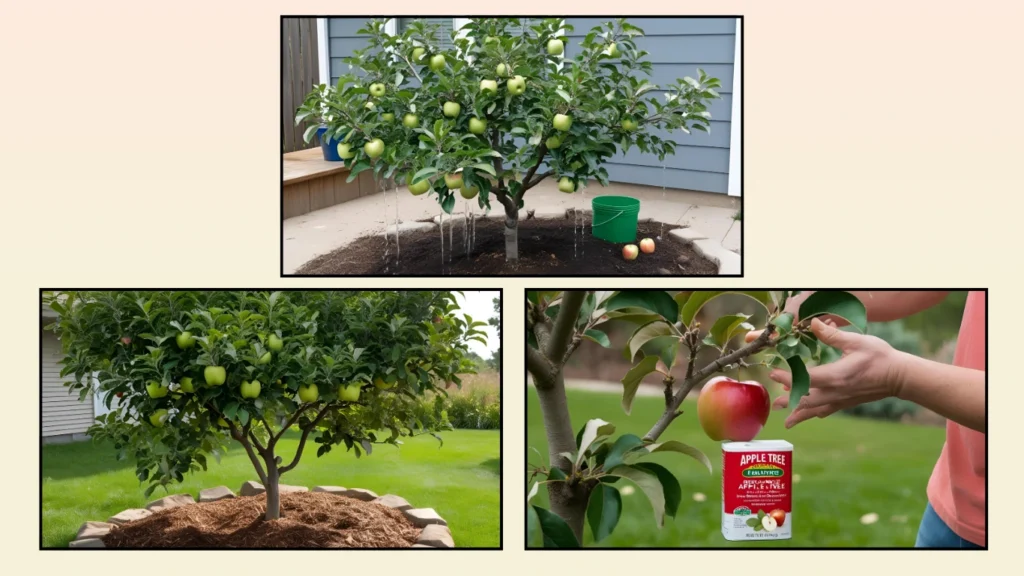
- Watering: For the first few months, I watered it once a week, giving it a deep soak. During hot or dry weeks, I watered a little more often.
- Mulching: I refreshed the mulch every few months to help hold moisture and prevent weeds.
- Fertilizing: In the spring, I gave my tree a little boost with a balanced fertilizer to support healthy growth.
I also kept an eye out for pests and diseases. If I spotted any problems, I treated them early with organic sprays or simple garden soap.
Step 6: How Long It Took for My Apple Tree to Grow
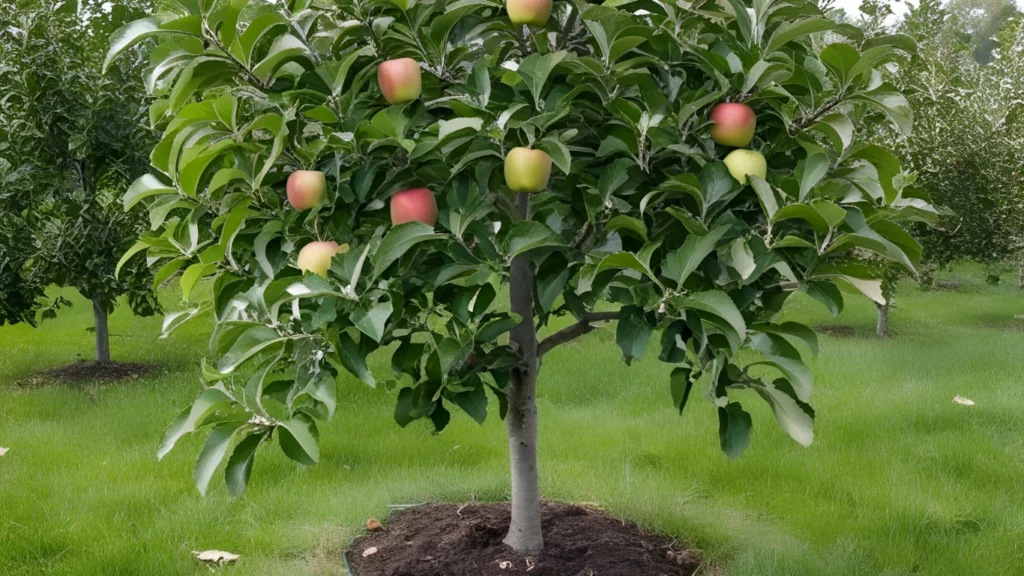
I learned very quickly that patience is key when growing an apple tree from seed.
Here’s the real timeline I experienced:
- It took about 6 weeks for the seeds to sprout.
- It took another 6 to 12 months for my seedling to grow into a young tree strong enough to survive outside.
- As for fruit? I knew it would take anywhere from 6 to 10 years before I might see my first apples.
I didn’t mind the wait — for me, growing the tree itself was already a huge success!
Step 7: Pruning and Training My Apple Tree
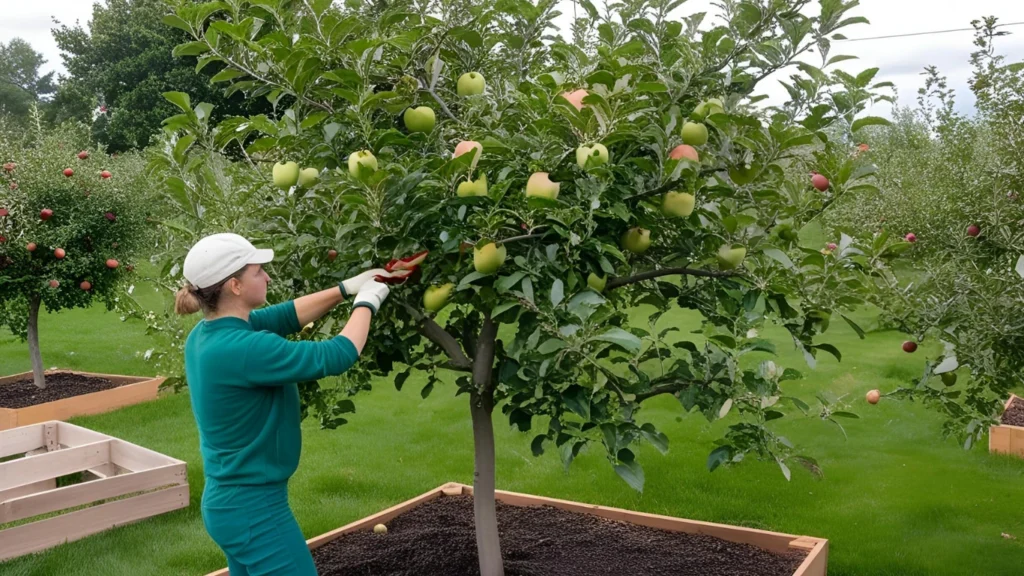
As my tree grew taller, I realized that pruning was super important for shaping it and keeping it healthy.
Here’s what I did:
- In the first year, I removed any weak or crossing branches to help it grow stronger.
- Each spring, I trimmed back about 20-30% of the new growth to encourage a good shape.
- I aimed for an open center style, which lets sunlight reach every branch.
Pruning seemed a little scary at first, but after my first few tries, I saw how much better and healthier my tree looked.
FAQ
Can I really grow an apple tree from store-bought apple seeds?
Yes, I did it! But I learned that the apples you eventually get might not be exactly like the one you took the seeds from, because of how apples cross-pollinate. It’s a bit of a fun mystery!
How deep do apple tree roots grow?
From what I’ve seen and researched, most apple tree roots stay pretty shallow — usually around 12 to 36 inches deep. But the roots spread wide, helping the tree stay strong.
How long does it take before an apple tree grown from seed bears fruit?
For me, I’m prepared to wait 6 to 10 years. Some trees might take even longer, depending on the growing conditions.
Is it easier to grow an apple tree from cuttings?
Growing from cuttings can be faster than from seeds, but I wanted the full experience of starting from scratch with seeds. It just felt more personal and rewarding for me.