Hornets can pose a serious threat when they build nests around your home, garden, or business. Known for their aggressive defense and painful stings, it’s crucial to approach hornet nest removal with caution and the right strategy. Whether you’re dealing with a small nest on a tree branch or a large colony hidden in a wall, knowing how to identify, approach, and remove a hornet nest safely is essential. In this guide, we’ll walk you through different types of hornet nests, DIY removal steps, safety gear, and when it’s best to leave the job to professionals.
Hornet Nest Identification
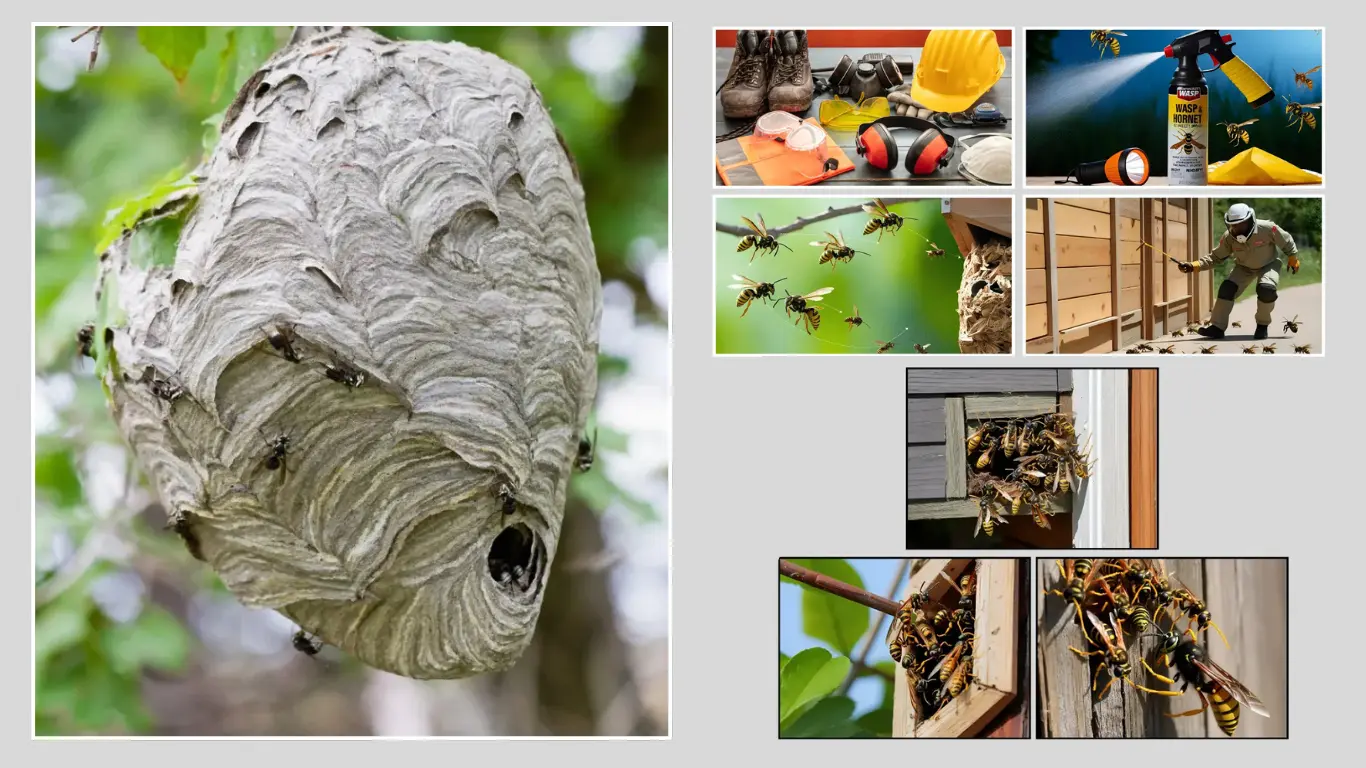
Before attempting removal, it’s important to correctly identify a hornet nest. Hornets build nests in a variety of locations, and recognizing the type and activity level helps you plan safe and effective removal.
Types of Hornet Nests
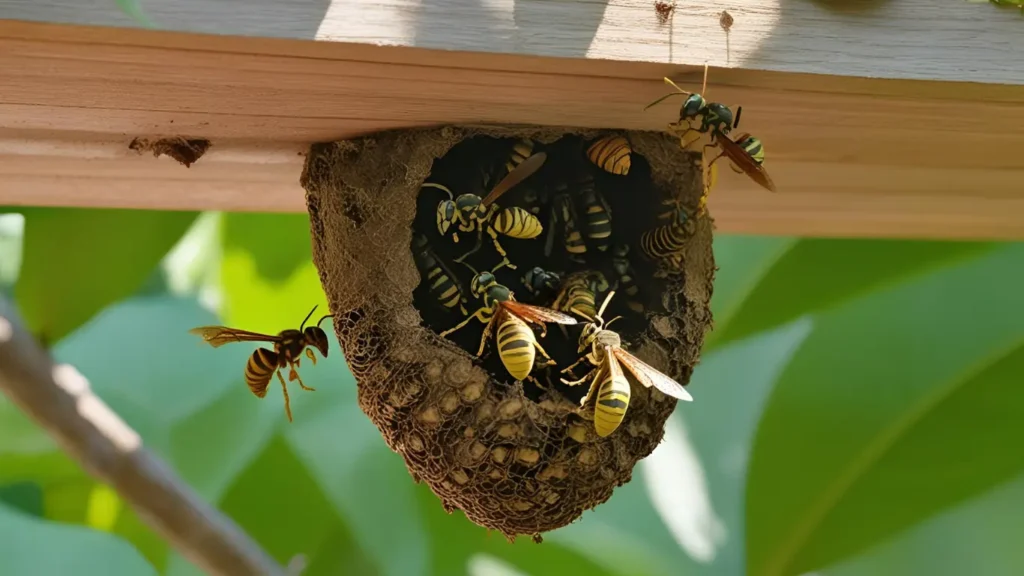
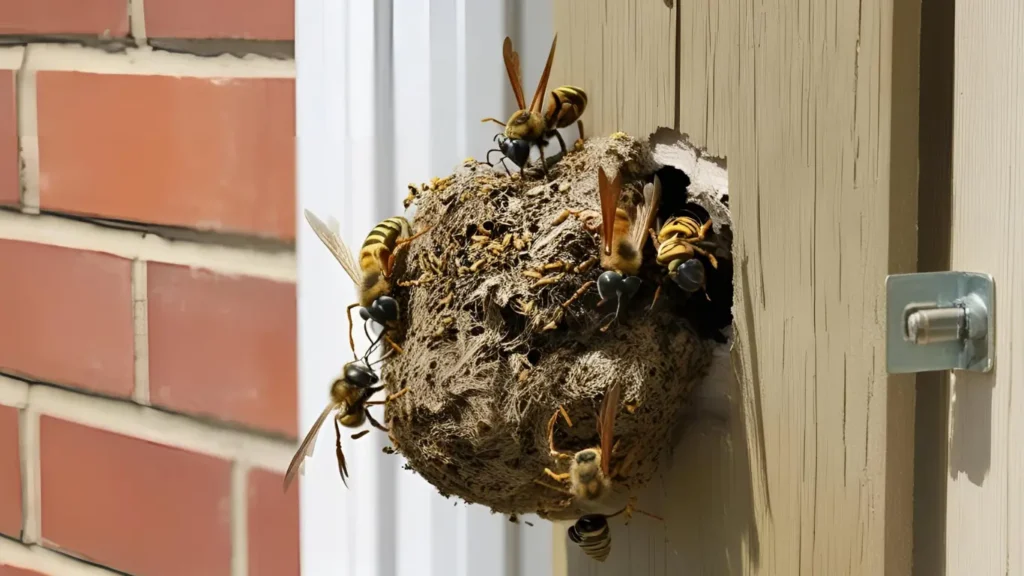
- Aerial Nests: Often found hanging from tree branches, under roof eaves, or in attic corners. These nests are papery and football-shaped.
- Ground Nests: Located in soil, abandoned burrows, or under shrubs. They are less visible and more dangerous if disturbed unexpectedly.
- Wall Cavity Nests: Hidden inside wall voids, sheds, or attics. Often only noticeable by observing hornets entering and exiting through small holes or cracks.
How to Spot an Active Nest
- Observe for hornets flying in and out of a single point.
- Listen for a faint buzzing or humming sound from enclosed spaces.
- Watch nest surfaces for constant movement during the day.
- Peak activity occurs mid-morning to mid-afternoon on warm days.
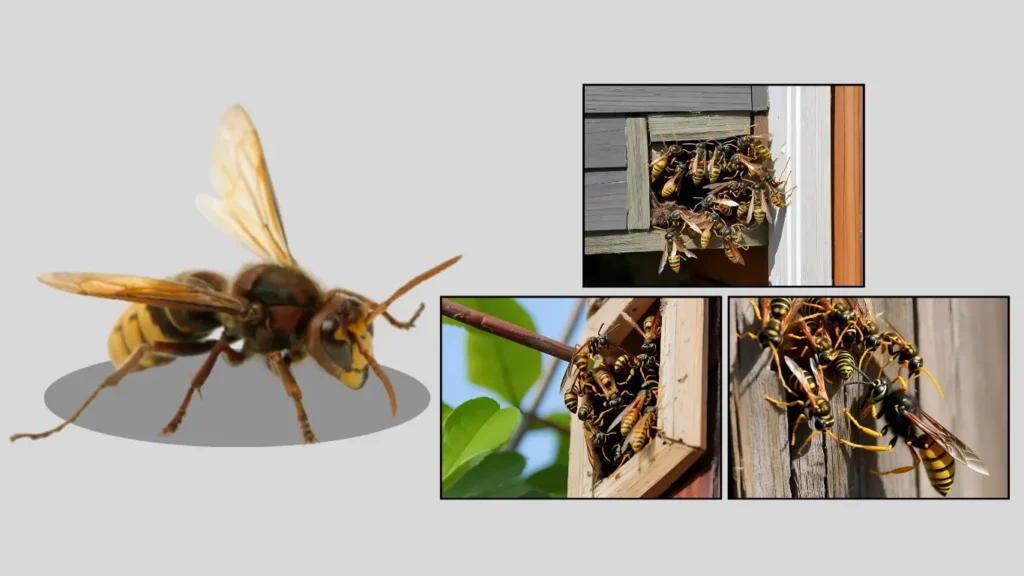
Hornets vs. Wasps vs. Bees
- Hornets: Larger, more robust bodies with smooth stingers that allow multiple stings.
- Wasps: Slimmer bodies, more colorful, and often nest in open structures.
- Bees: Hairier, smaller, and less aggressive. Only sting once and are usually less defensive unless provoked.
When to Remove a Hornet Nest
Timing is critical when it comes to hornet nest removal. The safest time to remove a nest is either very early in the morning or late in the evening when hornets are less active and inside the nest. Attempting removal during the daytime, when hornets are actively foraging and defending their territory, greatly increases the risk of being stung.
Seasonal timing also matters. In early spring, nests are smaller and contain fewer hornets, making removal easier and less dangerous. By late summer or early fall, hornet colonies reach peak population, and their behavior becomes more aggressive as they defend their mature nest and prepare for colder weather.
Delaying removal increases the chance of accidental encounters and hornet attacks, especially near high-traffic areas like porches, doorways, sheds, or garden paths. If you notice a nest in such areas, it’s best to act quickly, either by using DIY methods (for small nests) or contacting a pest control professional for large or hard-to-reach infestations.
Preparation Before Removal
Proper preparation is essential before attempting to remove a hornet nest. A lack of planning or safety measures can result in multiple painful stings or even dangerous allergic reactions. Whether you’re handling the removal yourself or preparing to guide a professional, here are the key steps to take:
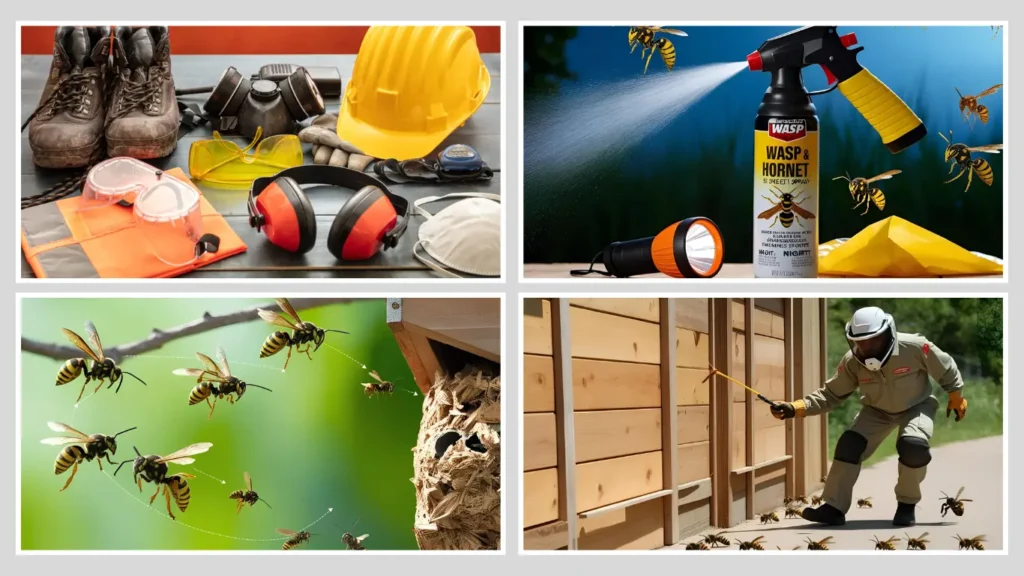
1. Wear Full Protective Gear
You should never approach a hornet nest without protection. Use thick, long-sleeved clothing, gloves, closed-toe shoes, and ideally a beekeeping veil or face shield. Hornets aim for the face and upper body, so head and neck protection is critical.
2. Choose the Right Tools and Sprays
Select a wasp and hornet spray that projects a strong stream from a distance (15–20 feet) and is labeled for use at night. Have a flashlight with a red filter or indirect light (hornets are less sensitive to red light) if working after dusk. You may also need a garbage bag, long pole or broom handle, and a ladder (if the nest is elevated).
3. Observe Nest Behavior in Advance
Spend a day observing the nest from a safe distance. Note the hornets’ flight paths, the exact nest location, and the best escape route if things go wrong. Understanding their patterns will help you plan a quick and effective strike.
4. Plan Your Escape Route
Before you act, ensure you have a clear path to retreat quickly. Avoid narrow or cluttered spaces where you might trip while hornets are in pursuit.
5. Notify Others and Keep Pets Away
Inform anyone nearby—family, neighbors, or coworkers—of your plans. Keep pets and children indoors and away from the area until the nest is removed and all activity has ceased.
With these steps completed, you’ll be ready to approach the actual removal process with more confidence and safety.
Hornet Removal 6 Effective Methods
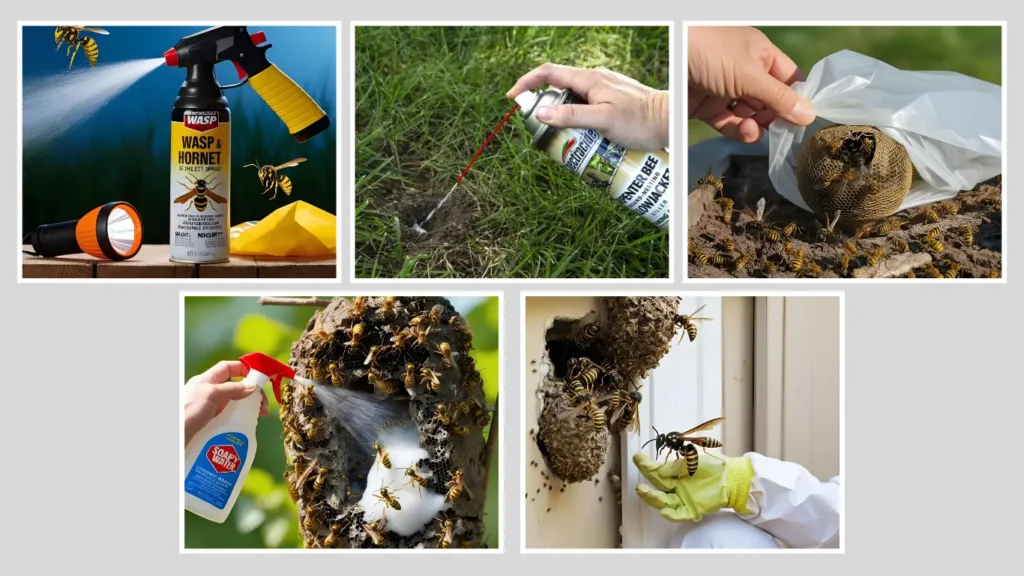
Removing a hornet nest on your own can be effective for small or early-stage infestations, but only if done with care and the right technique. Here are five proven methods you can use to eliminate hornets from your property safely.
1. Aerosol Hornet and Wasp Spray
This is the most common and reliable DIY method for hornet nest removal. Use a pressurized insecticide spray specifically labeled for hornets and wasps. These sprays shoot up to 20 feet, allowing you to treat the nest from a safe distance. Spray directly into the nest entrance during dusk or early morning when hornets are inside and inactive. After soaking the nest thoroughly, retreat immediately and monitor from a distance. If no activity is observed after 24 hours, knock down the nest and dispose of it in a sealed bag.
2. Ground Nest Insecticide Treatment
For hornets nesting underground, use a powdered or foam insecticide designed for in-ground use. Locate the entrance hole during daylight, then return after dark with your safety gear on. Apply the product directly into the hole and cover it with soil or a heavy rock. Never use fire, boiling water, or gasoline—these methods are dangerous and ineffective.
3. Bag-and-Remove Technique for Small Nests
This method works best for early-stage nests that are less than the size of a tennis ball and contain few hornets. During early morning or late evening, gently and quickly place a thick garbage bag over the entire nest, then detach the nest from its surface using a long stick or broom handle. Immediately seal the bag and submerge it in a bucket of soapy water for several hours to ensure all hornets are dead.
4. Soapy Water Spray for Early Nests
Soapy water clogs hornets’ breathing pores and kills them on contact. Mix two tablespoons of dish soap per quart of water and spray the nest thoroughly. This method is best for newly formed aerial nests with few hornets. While it’s a less toxic alternative to chemical sprays, it may not be effective for larger, established nests.
5. Professional Hornet Nest Removal Services
If the nest is large, inside a wall, or located in a high-risk area (like near an entryway), hiring a professional pest control expert is the safest choice. Professionals have access to protective gear, industrial-grade insecticides, and experience dealing with aggressive colonies.
Dangers of DIY Removal
While DIY hornet nest removal can be effective for small or early-stage nests, it carries serious risks. Hornets are highly territorial and will aggressively defend their nest if they sense a threat. Disturbing a nest without proper protection can lead to multiple painful stings in seconds. This is especially dangerous for individuals who are allergic to hornet venom, as even a single sting can trigger anaphylaxis—a potentially life-threatening reaction.
Moreover, nests located in difficult-to-reach places like attics, chimneys, or wall voids can cause hornets to become trapped indoors and attack unpredictably. Using the wrong removal methods—such as burning, flooding, or spraying during peak activity hours—can make the situation worse and provoke swarms.
Aftercare and Prevention
After successfully removing a hornet nest, taking a few final steps ensures your safety and helps prevent future infestations.
Disposing of the Nest
Once the nest is inactive (no hornet activity for at least 24–48 hours), use gloves and a sealed garbage bag to carefully remove it. If possible, knock it down using a long stick or broom handle. Submerge the nest in soapy water or double-bag it before placing it in the outdoor trash to avoid attracting other insects.
Treating Stings if Attacked
If you were stung during the removal, immediately wash the sting area with soap and water. Apply a cold compress to reduce pain and swelling. Over-the-counter antihistamines can ease itching, while ibuprofen or acetaminophen can manage discomfort. Seek emergency care if symptoms of a severe allergic reaction appear, such as trouble breathing or swelling in the face or throat.
Preventing Future Hornet Infestations
To avoid another infestation, inspect your property regularly, especially in spring when queens search for nesting sites. Hang fake hornet nests to discourage new colonies (hornets tend to avoid areas with existing nests). Seal cracks, vents, and wall openings around your home. Trim trees and shrubs to reduce potential nesting sites and maintain cleanliness around trash bins and outdoor eating areas.
FAQs
Can I remove a hornet nest at night?
Yes, nighttime is the safest time to remove a hornet nest because hornets are less active and inside the nest. Use a red-filter flashlight, as hornets are less sensitive to red light.
Is it safe to remove a hornet nest alone?
It depends on the nest size and location. Small, early-stage nests may be manageable alone with proper gear, but large or hidden nests should always be handled by professionals.
What if hornets rebuild the nest?
Hornets do not reuse old nests, but they may build a new one nearby. Prevent this by removing the old nest, sealing entry points, and using deterrents like decoy nests.
What time of year are hornets most active?
Hornets are most active during late summer and early fall. Nests start in spring and peak in population by late summer, making removal harder and riskier during those months.
Conclusion
Hornet nest removal is not just about getting rid of the immediate threat—it’s about protecting your home and safety long-term. Always use caution, wear protective gear, and choose the right method based on nest size and location. If in doubt, don’t take chances—call a professional. With the right approach and preventive steps, you can keep your property hornet-free and safe year-round.