Navigating the world of spider bites can be daunting, especially for those of us who have had our fair share of arachnid encounters. Drawing from my personal experiences, I’ve honed a step-by-step identification process that has proven invaluable in understanding and handling spider bites.
In this comprehensive guide, I’ll share my journey and insights to empower you with a practical approach to identifying and responding to spider bites effectively.
Species Overview
Before delving into the identification process, it’s essential to acquaint ourselves with the spider species prevalent in our region. In my encounters, I’ve come across the likes of Garden Spiders, Jumping Spiders, Black Widows and Orb Weaver Spiders. Understanding their habits, habitats, and general appearances can serve as a vital starting point in narrowing down potential culprits responsible for spider bites.
Step 1: Initial Observation
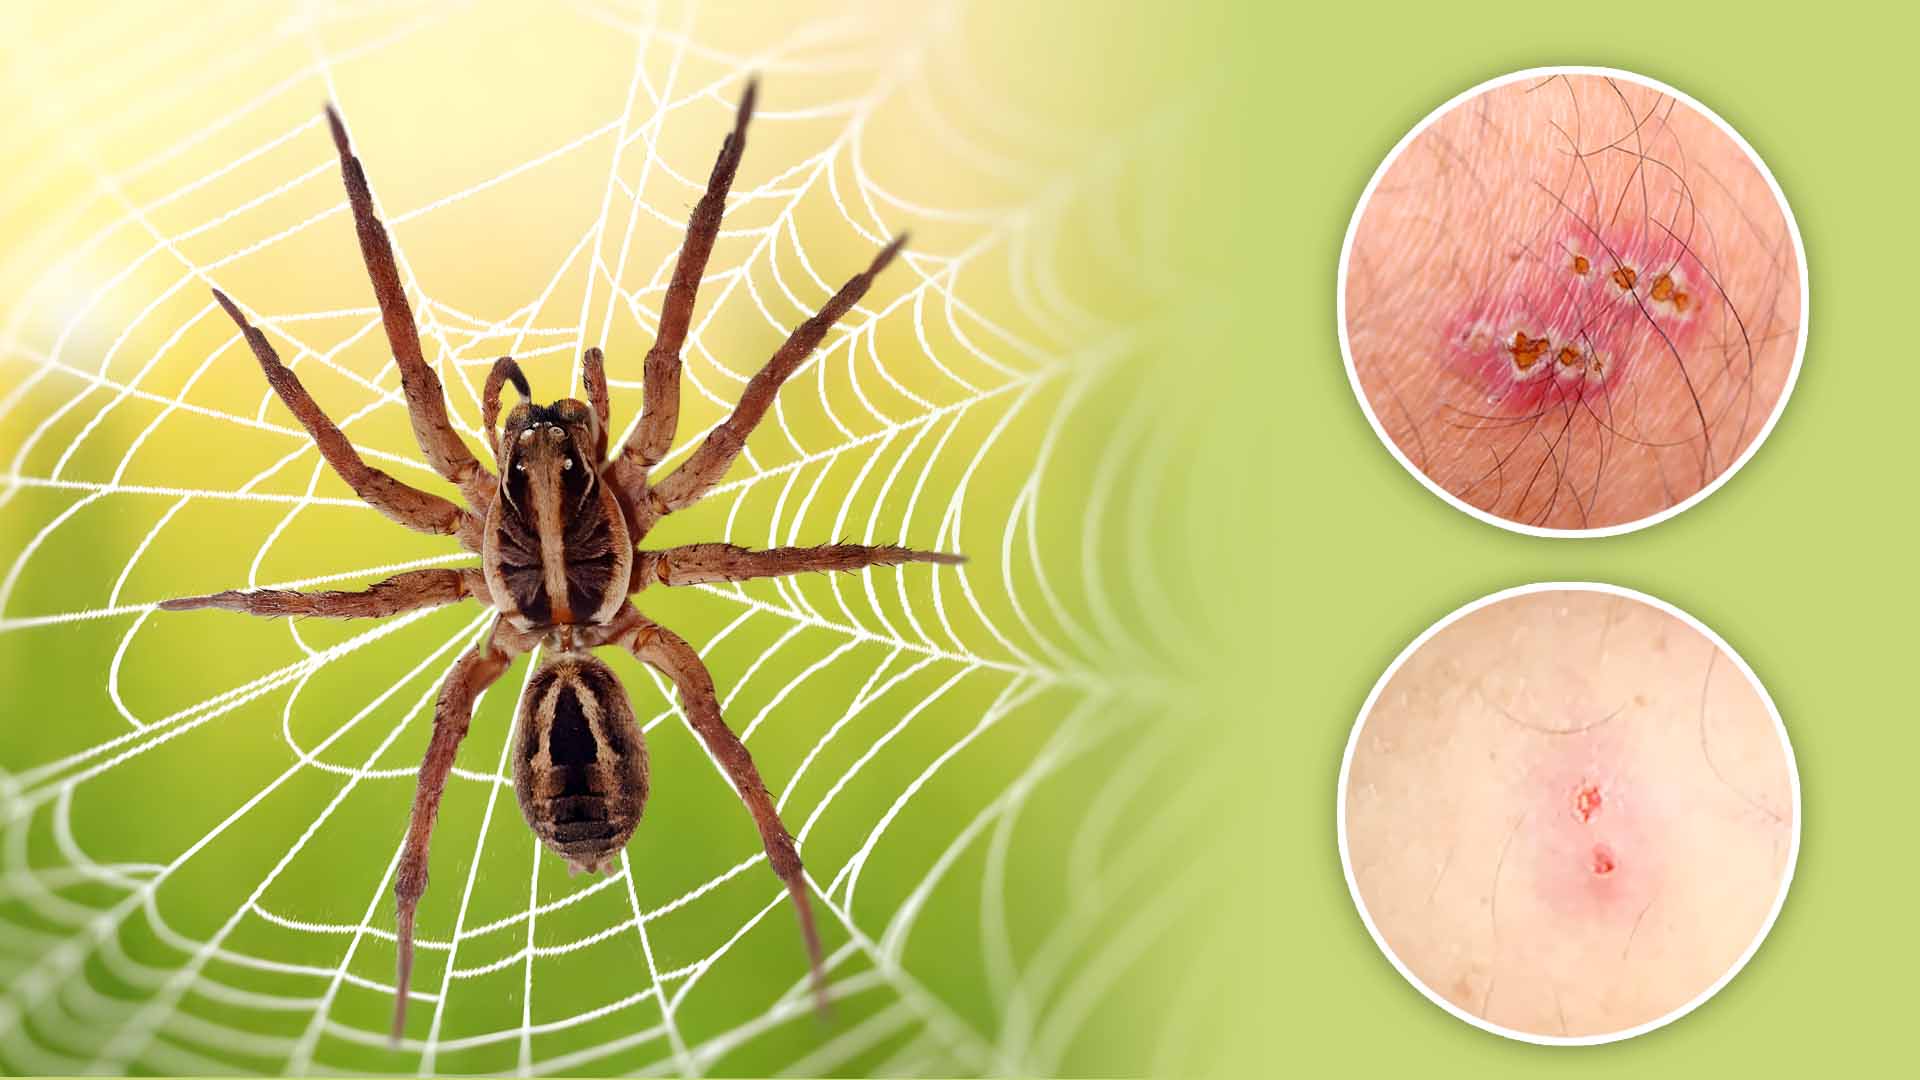
Upon discovering a spider bite, the initial moments are crucial. Instead of succumbing to panic, I’ve learned to take a deep breath and adopt a composed mindset. I begin by closely observing the bite area, noting any immediate symptoms. Factors like the size of the bite, its color, and any distinct markings around it form the foundation of my observation.
Remaining calm during this phase is vital, as panic can cloud judgment and potentially lead to misinterpretation of the situation. Most importantly, I remind myself that the majority of spider bites are not life-threatening and can be managed effectively with the right approach.
Step 2: Immediate Reactions
The immediate reactions around the bite area provide valuable insights into the nature of the bite. Itching, redness, localized pain, and swelling are typical responses. To differentiate a spider bite from other possibilities, I draw upon past experiences with insect bites or minor allergic reactions.
Comparing the observed symptoms to those from my previous encounters aids in determining whether the bite is consistent with a spider bite. This critical analysis helps in refining the identification process, steering me toward more accurate conclusions.
Step 3: Progression of Symptoms
Spider bite symptoms don’t remain static; they evolve over time. Keeping a keen eye on this progression is crucial. If the pain intensifies, swelling increases, or if blisters and ulcers emerge, it’s a red flag that demands attention. Furthermore, I stay vigilant for systemic symptoms such as fever or chills, as these can indicate a more serious reaction that requires immediate medical intervention.
By documenting these changes and developments, I gather a comprehensive picture that aids in identifying the spider responsible for the bite and assessing its potential risks.
Step 4: Spider Bite Characteristics
Different spider species leave distinct marks, each with its own set of characteristics. Over time, I’ve become well-versed in the traits associated with various spider bites. For instance, bites from Jumping Spiders typically lead to mild discomfort, whereas Brown Recluse bites can result in necrotic tissue and localized pain.
This acquired knowledge not only helps me understand the potential risks associated with different spider bites but also informs the actions I need to take in response to each scenario.
Step 5: Identifying the Spider
Whenever feasible, I prioritize identifying the spider responsible for the bite. This step involves a close examination of the spider’s appearance, comparing it to reference images or descriptions. Factors such as color patterns, leg arrangements, and distinctive features play a pivotal role in this process.
If I manage to capture the spider safely, I take clear photographs to facilitate expert identification. These images often prove invaluable in distinguishing between harmless and potentially dangerous species.
Step 6: Seek Medical Attention
While the majority of spider bites are manageable, some scenarios warrant immediate medical attention. If symptoms are severe—such as difficulty breathing or widespread reactions—or if uncertainty lingers about the spider’s identity, seeking medical help is a non-negotiable step. Timely medical intervention can ensure proper treatment and prevent complications.
Having a clear understanding of when medical attention is necessary ensures that I prioritize my well-being and minimize risks associated with potential venomous bites.
Step 7: First Aid and Treatment
While awaiting medical assistance, I take certain first-aid measures to alleviate discomfort and reduce risks. Thoroughly washing the bite area with soap and water minimizes the chances of infection. Applying cold compress aids in reducing swelling, and elevating the affected limb, if possible, contributes to better comfort.
These simple yet effective first-aid steps are crucial in managing the immediate aftermath of a spider bite and contribute to a smoother recovery process.
Step 8: Prevention
Learning from experiences, I’ve embraced preventive measures to reduce the likelihood of future spider encounters. Before wearing clothes or shoes that have been left unattended, I ensure to shake them out thoroughly. Keeping outdoor spaces tidy and free of clutter minimizes spider habitats, and installing screens on windows and doors acts as a physical barrier against unwelcome arachnid visitors.
By adopting these preventive habits, I take proactive steps to minimize the chances of encountering potentially venomous spiders.
FAQ
How Do I Know if My Bite is from a Spider?
Identifying the source of a bite can sometimes be tricky, especially when it comes to differentiating spider bites from other insect bites or skin reactions. However, there are some telltale signs and symptoms that can help you determine if your bite is likely from a spider.
Two Signs and Symptoms of a Spider Bite
- Localized Pain and Swelling: One common sign of a spider bite is the presence of localized pain and swelling around the bite area. This discomfort is often more pronounced than that caused by a regular insect bite. The affected area may also become red and tender to the touch.
- Redness and Itching: Spider bites can cause redness and itching around the bite site. The area might feel irritated and inflamed, and scratching could exacerbate these symptoms.
Does a Spider Bite Have Two Holes or One?
There’s a common misconception that spider bites always have two holes, resembling fang marks. However, this is not a reliable indicator. While some spider bites can indeed leave two puncture marks, not all spiders have fangs large enough to create such distinctive marks. In fact, many spider bites might appear as a single puncture or even as a red, swollen area without visible punctures.
Is My Spider Bite Poisonous?
Most spider bites are not poisonous in the sense that they won’t lead to severe illness or death. However, some spider bites can contain venom that might cause varying degrees of discomfort and reactions in individuals. The severity of the reaction depends on factors like the type of spider, the amount of venom injected, and your individual sensitivity.
Conclusion
In this comprehensive guide, I’ve shared my personal spider bite identification process, developed through years of firsthand experiences. By following these steps, you too can approach spider bites with confidence and clarity. Remember that observation, informed judgment and timely actions are your allies in handling spider bite situations effectively. Whether it’s assessing symptoms, identifying the spider, seeking medical attention, or implementing preventive measures, this guide equips you with the tools needed to navigate the world of spider bites with resilience and knowledge.